Please note this information is for educational purposes only and procedures should not conducted based on this information. OSCEstop and authors take no responsibility for errors or for the use of any content.
Open the central venous catheter insertion pack to form a large sterile field on the top of the trolley
Open packets (without touching the instruments themselves) and drop sterile instruments neatly into the sterile field
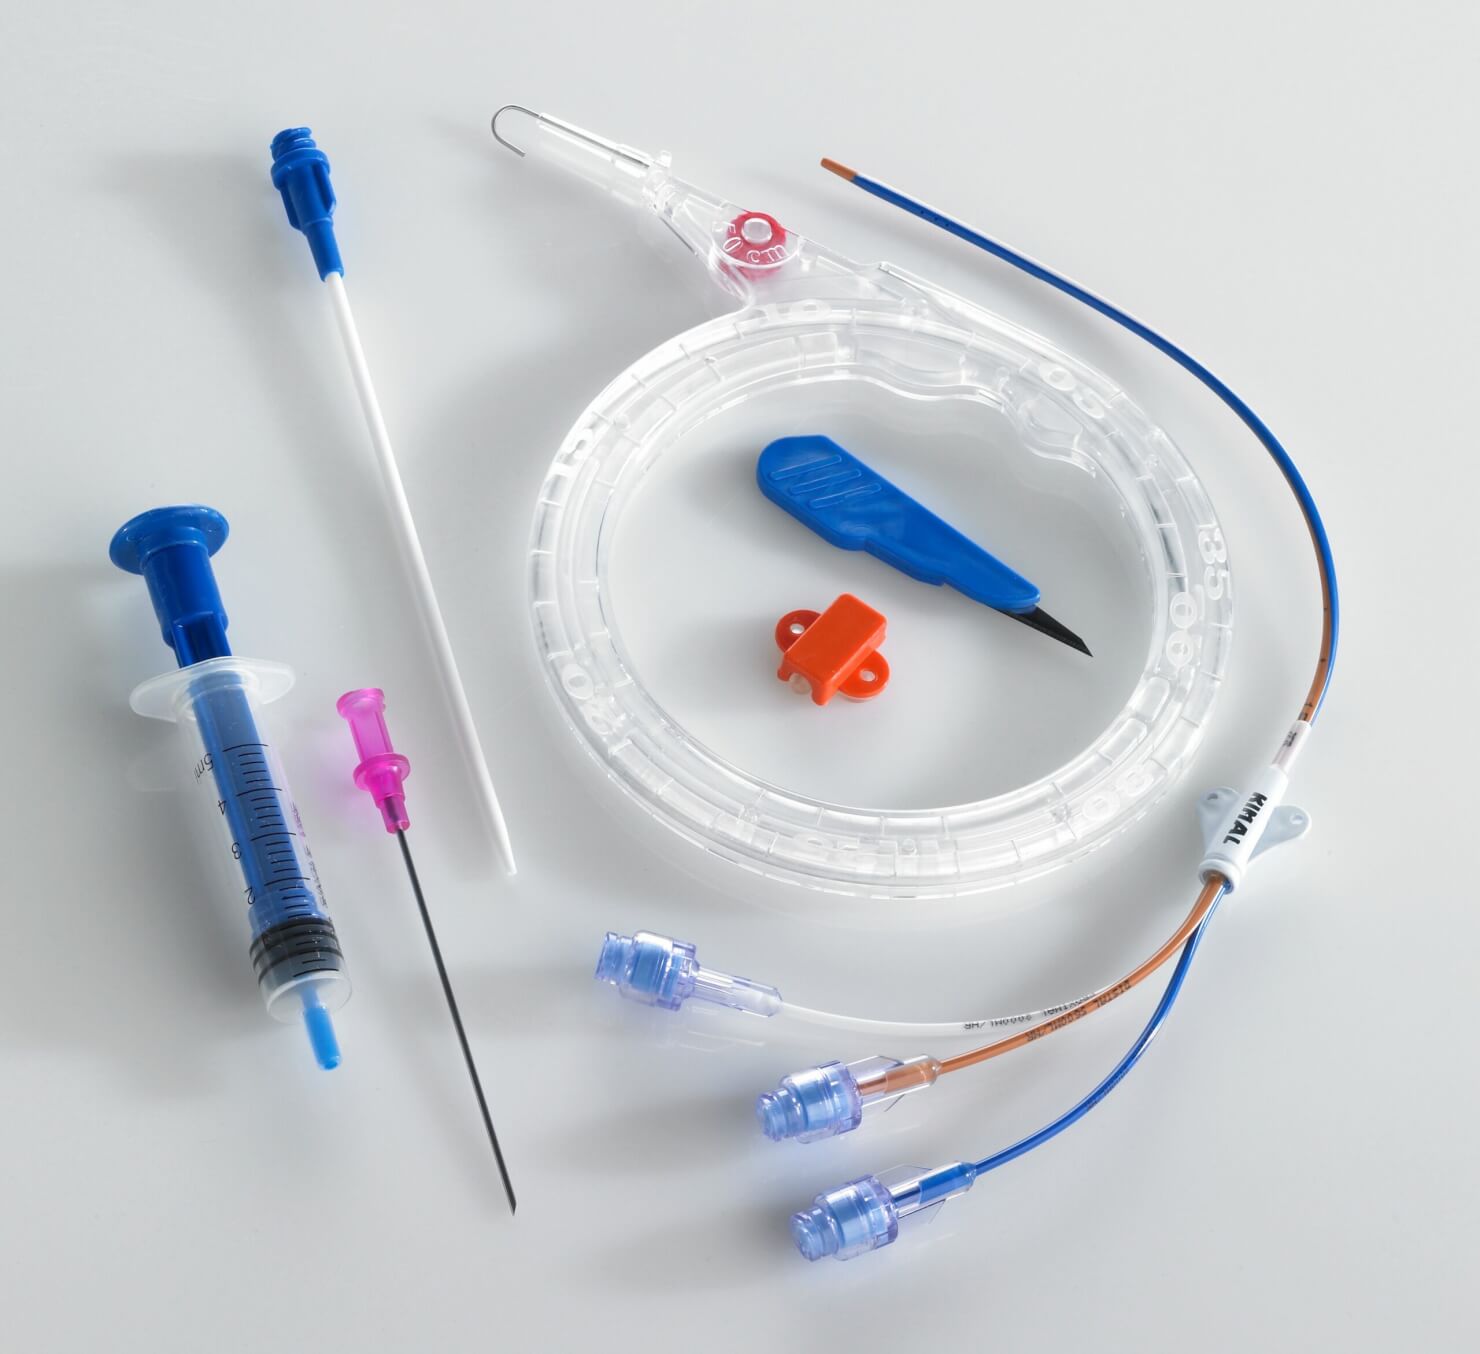
CVC insertion kit
Patient part
Positioning and exposure
Expose area
Position patient:
Internal jugular/subclavian: lying with head of bed 10-15˚ downwards (head turned slightly away from side of insertion)
Femoral: lying with foot of bed downwards (slight external rotation of hip)
Ultrasound area to confirm anatomy and locate insertion point (right side preferred):
Internal jugular: apex of triangle formed by the sternal and clavicular heads of sternocleidomastoid muscle and the clavicle, which is around the level of the cricoid cartilage, just lateral to carotid artery (needle at 45˚ to the skin aiming inferolaterally towards ipsilateral nipple)
Subclavian: 1cm inferior to the junction of the outer and middle thirds of the clavicle (needle at 30˚ to the skin aiming medially towards the suprasternal notch)
Femoral: 1cm medial to femoral artery pulsation, 2-3cm inferior of the inguinal ligament (needle at 45˚ to the skin aiming towards the head)
Note: position ultrasound probe out-of-plane (perpendicular to vein) and confirm the vessel is a vein by ensuring it is compressible and not pulsating
Wipe off ultrasound gel and mark insertion point with skin pen/indentation
Preparation
Wash hands using Chlorhexidine solution, then apply sterile gown and gloves using the surgical scrub technique
Prepare equipment in sterile field
Arrange into order
Slightly retract the guidewire in its sheath to straighten the J-tip it using the plastic nozzle
Ask assistant to pour 50ml sterile saline into sterile bowel
Draw up saline in 10ml syringe and flush all lumens of the central venous catheter and clamp and bung all ports except the brown port (distal port where the guidewire will come out) – leave cap off this port
Sterilize area
Work from middle outwards in one spiral motion (using cleansing snap-sponge)
Repeat this with 2nd cleansing snap-sponge
Discard used snap-sponges as they are no longer sterile, but note all equipment used after this (including all needles) can be returned to the sterile field after use
Apply the sterile drape over the patient’s body so that the hole is in the correct place to allow access to the insertion site (or apply 4 drapes centred around exposed insertion site if no holes) – if patient is conscious explain their face will be covered but they can signal for attention by raising hand
Prepare ultrasound probe
Ask assistant to put gel on ultrasound probe and hold it still while you apply the sterile probe cover over the top
Apply sterile gel to outer surface of the covered probe and rest in sterile field
Note: you should always use your non-dominant hand to hold the ultrasound probe whenever required, so you can use your dominant hand to do things at the same time
Anaesthetise tract
Ask assistant to snap open lidocaine bottle and hold open upside-down
Draw up lidocaine using drawing-up needle on 10 ml syringe and expel any air, then change to the orange needle
Use ultrasound to confirm the entry site
Insert orange needle at an acute angle to form a single subcutaneous lidocaine bleb around insertion site in order to anaesthetise the skin
Change to the green needle
Using direct ultrasound guidance, anaesthetise the subcutaneous tissues and around the vein (always aspirate before injecting lidocaine to check you are not in a vessel)
Put the lidocaine-filled syringe to the far side of the sterile field with the needle still attached – ensure that you do not confuse it for a saline flush
Now wait 1 minute for the anaesthetic to work, while you prepare the equipment
Seldinger insertion procedure
Introducer needle insertion
Under direct ultrasound guidance (keeping the needle tip in the field), insert the introducer needle with the empty 5ml syringe attached
Slowly advance the needle aspirating during infiltration and stop as soon as blood is aspirated (do not put needle in more than half way)
Now put ultrasound probe down
Holding the needle steady by the skin with your non-dominant hand, detach syringe
Confirm you are not in an artery by either:
Asking the assistant to run the aspirated blood through a blood gas machine (you can insert guidewire while waiting for the result but not proceed beyond this)
Or, by manometry by attaching a length of sterile tubing to the needle and holding it below the neck allowing it to fill with blood, then elevate the tubing observing the fall of the column of blood to a level consistent with venous pressure
Or, by pressure transduction
Guidewire insertion
Place the guidewire nozzle into the end of the needle and use your thumb to seed the guidewire out of its sheath directly into the end of the needle while you watch the cardiac monitor for ectopics/arrhythmias (if using internal jugular/subclavian vein)
Aim to insert 15cm of wire (there is usually three black marks to signify 15cm) but if you see ectopics/arrhythmias stop and withdraw guidewire slightly until they resolve
From now on, keep hold of the guidewire at all times with one hand, as close to the skin as possible – you can hold it in a loop to make things easier
Note: if you need to move the hand holding the guidewire to the other side of an instrument on the wire, then ensure your other hand has hold of the guidewire temporarily while you move it so you never let go of the guidewire
Withdraw the needle and thread it right the way off the end of the guidewire, ensuring the guidewire remains in place
Now confirm the guidewire is in the vein using ultrasound (this should be done using in-plane view)
Make a 5mm skin incision where guidewire enters skin (with the scalpel perpendicular to the skin, press the scalpel blade straight in and out )
Tract dilation
Place gauze near insertion site in sterile field so you can dab blood as needed (a lot of blood will ooze out after the tract is dilated)
Thread the introducer over the guidewire and insert into the tract
Go in and out with a rotational movement (you should feel a ‘give’ as you enter the vein)
Withdraw the introducer and thread right the way off the end of the guidewire, ensuring the guidewire remains in place
Catheter insertion
Thread the central venous catheter over the guidewire until the tip is near the skin
Now retract the guidewire slowly until the end comes out of the brown central venous catheter port
Holding the end of the guidewire, insert the catheter all the way into the vein
When the catheter is in place, remove guidewire
Flushing
For each port in turn (starting with brown as it is already open):
Unclamp and remove bung
Aspirate blood with a syringe to confirm patency
Flush with 10ml saline from a different syringe
Clamp port and attach bung
Securing catheter
Suture in place to allow 4 points of fixation (i.e. suture all holes of central catheter’s hub to the skin)
Suture under skin near hole
Bring most of the needle end of suture out from skin (leaving ~7cm)
Tie an ‘air knot’ (this is done by tying the first throw of the knot slightly loose to the skin)
Thread needle through hole of hub with the blunt end first
Comments are closed for this post.