Please note this information is for educational purposes only and procedures should not conducted based on this information. OSCEstop and authors take no responsibility for errors or for the use of any content.
Contraindications: absent pulse, Raynaud syndrome, thromboangiitis obliterans, inadequate circulation to extremity, burns over site, vascular graft/arteriovenous fistula
Sites: radial artery is preferred site and is outlined below; brachial artery may also be used if radial is not possible; ultrasound is not required but usually kept available in case it is needed
Introduction
Wash hands, Introduce self, Patients name & DOB & wrist band, Explain procedure and get consent if possible
10ml 0.9% saline vial (for drawing up for flush if not using pre-prepared flush)
Walk to patient
Wash hands
Open the arterial line kit to form a large sterile field on the top of the trolley
Open packets (without touching the instruments themselves) and drop sterile instruments neatly into the sterile field
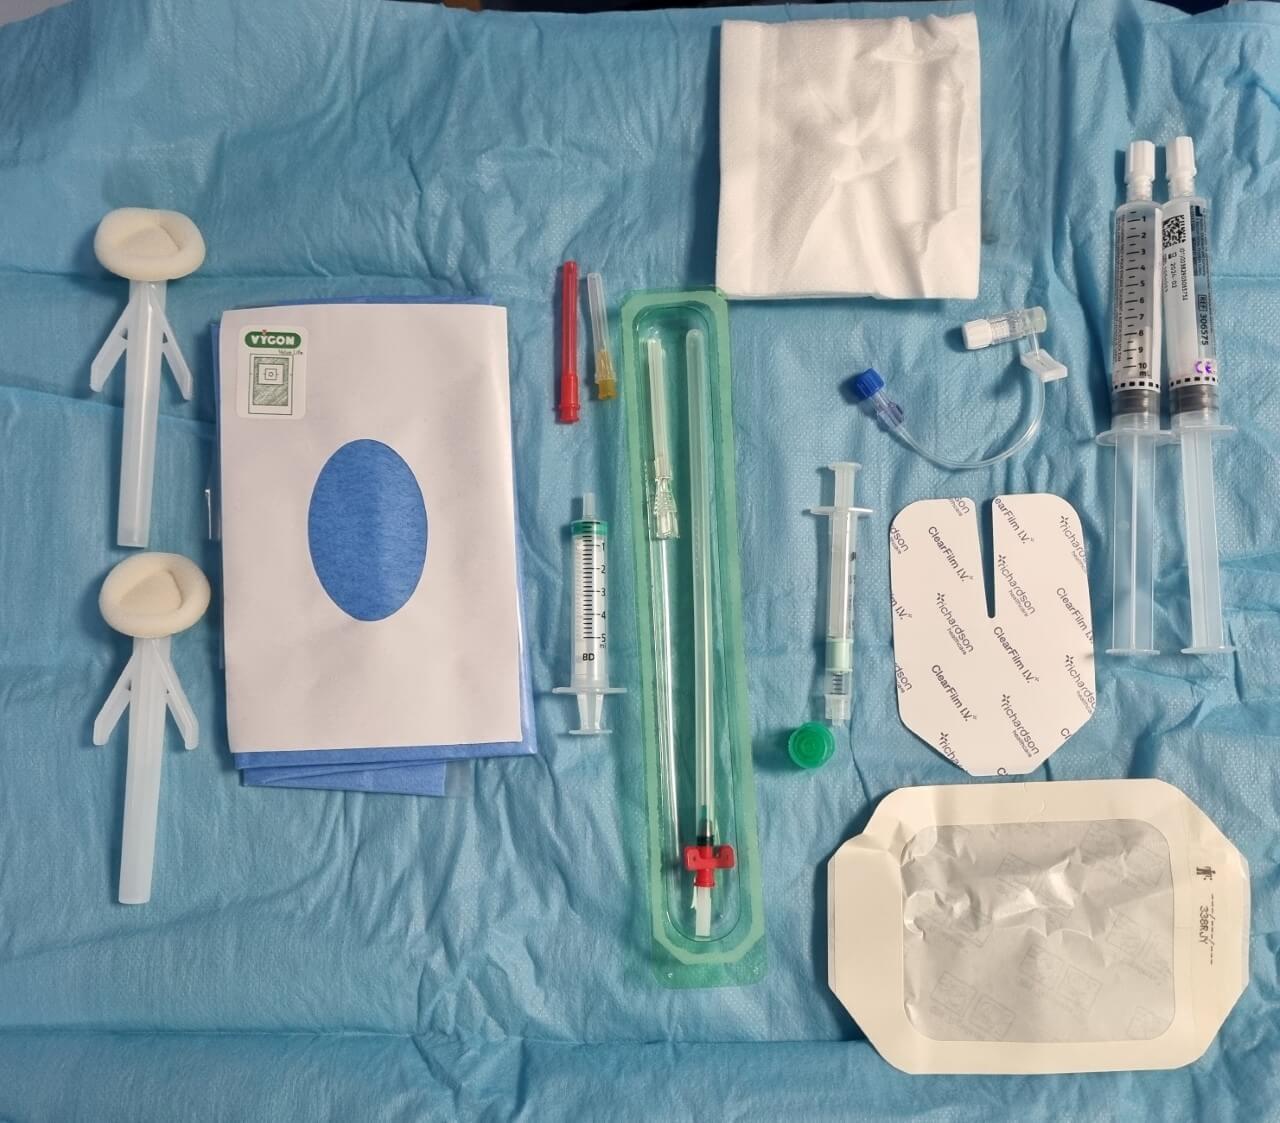
Arterial line insertion equipment
Patient part
Positioning and exposure
Position patient so wrist is accessible and hyperextended (use a folded clean towel if available)
Expose area
Palpate artery
Place incontinence pad under arm
Preparation
Wash hands
Apply sterile gloves using sterile technique
Prepare equipment in order in sterile field
Remove sheath and cap from arterial line, and then remove guidewire (keeping it in the correct orientation)
Flush arterial line connector with 0.9% saline from non-threaded end, then clamp lumen and replace cap
If not using pre-prepared flush: ask assistant to snap open 0.9% saline vial and hold open upside-down; then draw up using drawing up needle on 10ml syringe; then remove needle and expel any air
Sterilize area
Work from middle outwards in one spiral motion (using cleansing snap-sponge)
Repeat this with 2nd cleansing snap-sponge
Discard used snap-sponges as they are no longer sterile, but note all equipment used after this (including all needles) can be returned to the sterile field after use
Apply the sterile drape over the area, so that the hole is in the correct place to allow access to the insertion site
Place guidewire in correct orientation in patient’s sterile field so it is readily accessible
Anaesthetise area
Ask assistant to snap open lidocaine bottle and hold open upside-down
Draw up lidocaine using drawing up needle on 5ml syringe and expel any air, then change to the orange 25G needle
Insert needle at an acute angle to form a large subcutaneous lidocaine bleb around insertion site in order to anaesthetise the skin, ensuring you aspirate before injection to avoid injection into a blood vessel
Now wait 1 minute for the anaesthetic to work
Seldinger insertion procedure
Introducer needle insertion
Insert the bare introducer needle into the radial artery
Pierce the skin at 15-30⁰
Advance very slowly into the artery, looking for pulsating blood coming from the end of the needle
Flatten needle to skin
If you are unsuccessful, remove and flush the needle with 0.9% saline and try again (consider using ultrasound if needed)
Guidewire insertion
Insert the soft end of the guidewire into the introducer needle, leaving a few centimetres to hold
From now on, keep hold of the guidewire at all times with one hand
Withdraw the needle and thread it right the way off the end of the guidewire, ensuring the guidewire remains in place
Catheter insertion
Thread the arterial catheter over the guidewire until the tip is near the skin
Now retract the guidewire slowly until the end comes out of the port
Holding the end of the guidewire, insert the catheter all the way into the artery
When the catheter is in place, remove guidewire
Aspirate blood with the blood gas syringe
Attach the flushed arterial line connector (with cap on and lumen clamped) – the threaded end attaches to the arterial line
Flush connector and then clamp and replace bung
Securing catheter
Dry any blood with gauze
Apply cannula dressing then film dressing over the top
Comments are closed for this post.