Please note content is for educational purposes only and procedures should not conducted based on this information. OSCEstop and authors take no responsibility for errors or for the use of any content.
Indications: large volume ascites causing respiratory compromise or abdominal pain/pressure
Open sterile pack to form a sterile field on the top of the trolley
Open packets (without touching the instruments themselves) and drop sterile instruments neatly into the sterile field
Pick up waste bag from sterile pack without touching anything else and stick to side of trolley
Patient part
Positioning and exposure
Position patient lying supine in bed with head of bed elevated (aids fluid accumulation in lower abdomen)
Expose patient’s abdomen
If the insertion point has not already been marked using ultrasound…
Locate insertion point:
Traditionally in the right iliac fossa (approximately 5cm above and up to 5cm medial to the right ASIS) – right side is strongly preferred because patients may have splenomegaly and splenic varices on left
Tap out ascites and confirm flank dullness at intended insertion point
Use different site if there is overlying infection
Mark insertion point with a skin pen/indentation
Preparation
Wash hands
Apply sterile gloves using sterile technique (open pack on a side surface)
Sterilize area
Work from middle outwards in one spiral motion (using cleansing snap-sponge)
Repeat with second cleansing snap-sponge
Discard used snap-sponges as they are no longer sterile, but note all equipment used after this (including all needles) can be returned to the sterile field after use
Apply the sterile drape over the patient’s body so that the hole is in the correct place to allow access to the insertion site (or apply 2-3 drapes centred around exposed insertion site if no holes)
Anaesthetise tract
Ask assistant to snap open lidocaine bottle and hold open upside-down
Draw up lidocaine using drawing-up needle on 10 ml syringe and expel any air
Change to the orange needle and insert at an acute angle to form a single subcutaneous bleb around insertion site in order to anaesthetise the skin
Change to the green needle and insert perpendicular to the skin to anaesthetise the insertion tract
This is done by instilling lidocaine in small increments of increasing depth
Always aspirate when advancing the needle (so you know when you get to the peritoneal cavity) and aspirate before injecting lidocaine (to check you are not in a vessel)
When fluid is aspirated, remove needle and do not advance further
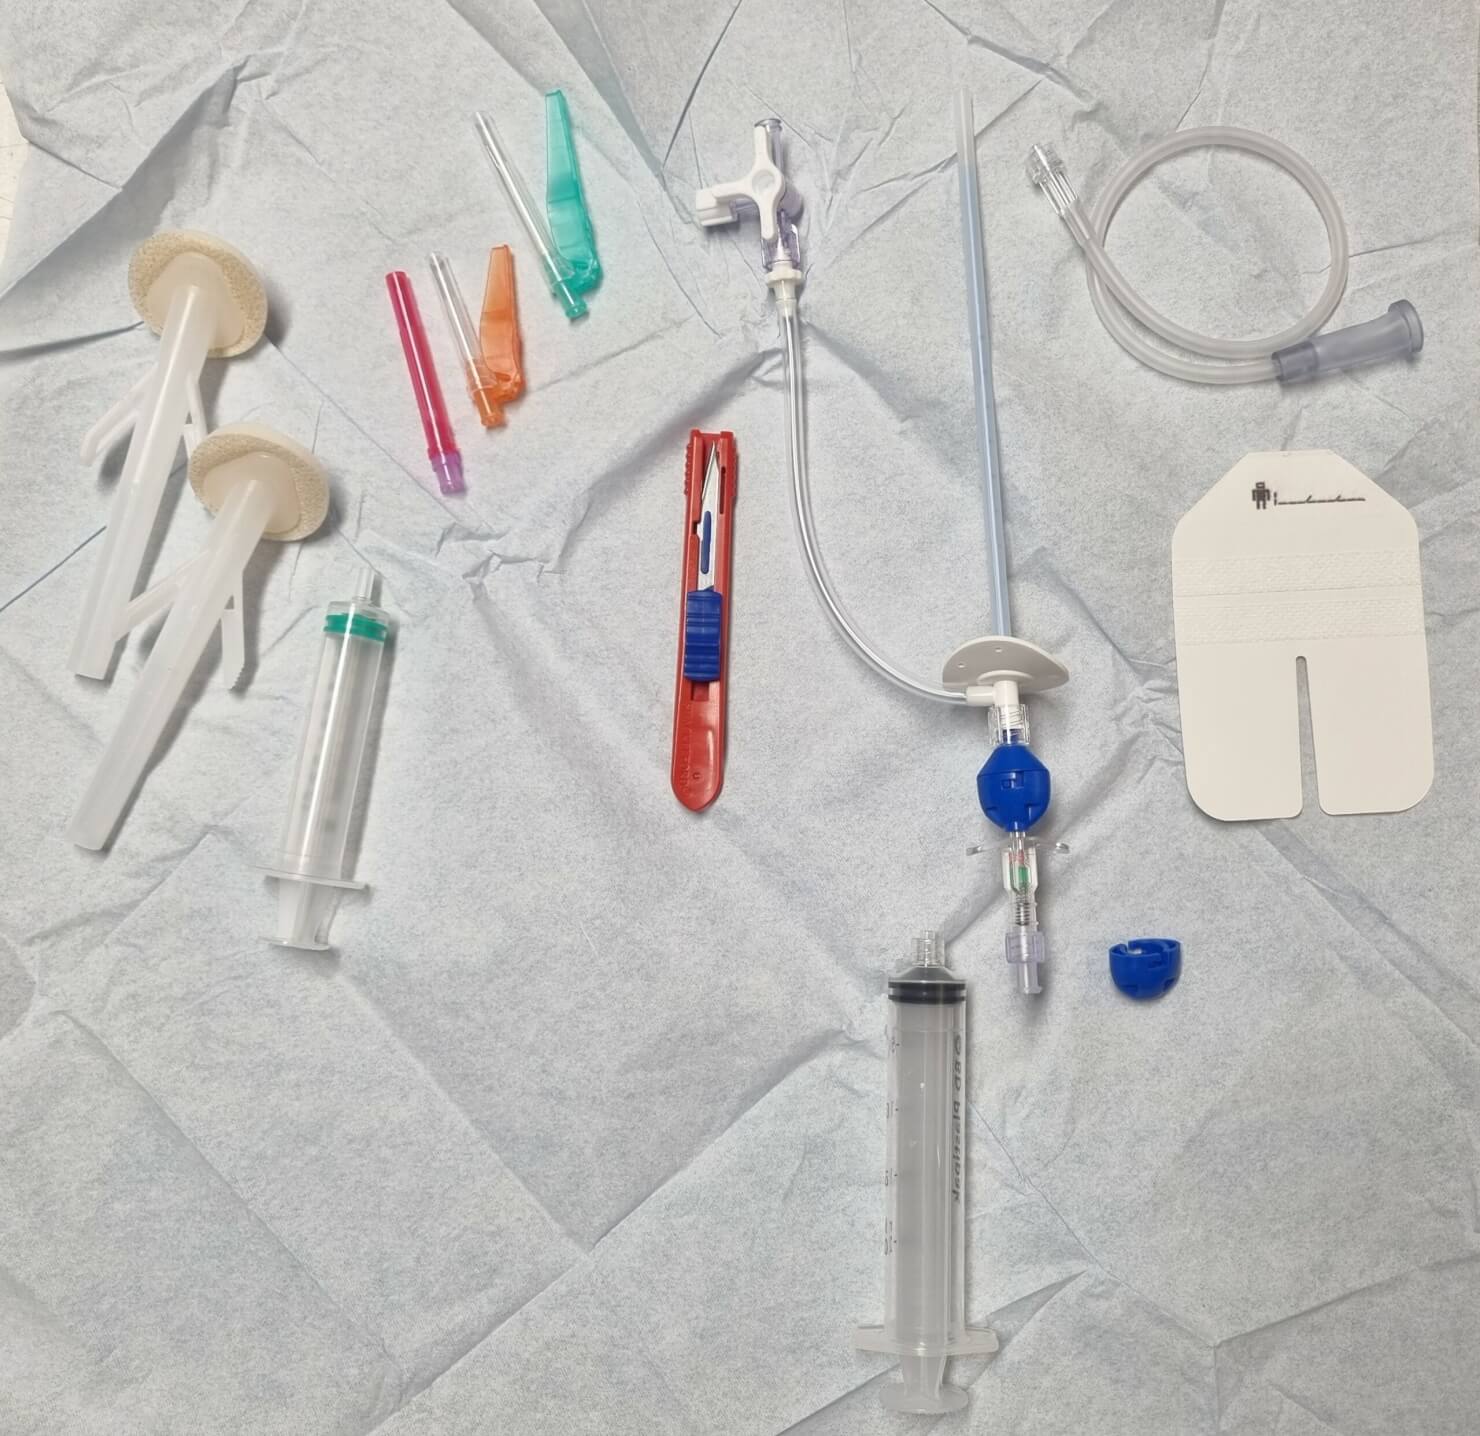
Now wait 1 minute for the anaesthetic to work, while you prepare the equipment and put in order:
Scalpel: expel blade
Needle/catheter preparation: attach 20ml syringe to end of needle; close 3-way tap; remove catheter sheath
Blue valve cap
Extension tubing
Ascitic drain kit
Paracentesis
Make a 2mm scalpel incision through the anaesthetised skin
Insert needle perpendicular to the skin into the same tract, aspirating during infiltration
When fluid is aspirated, advance 5-10mm further to ensure the tip of the catheter enters the peritoneal cavity (not just the tip of the needle) – safety needle kits may also click as they enter the peritoneal cavity
Holding the needle still, undo the blue valve and advance the catheter off the end of the needle until the flange touches the skin
Remove needle
Attach the blue valve cap to the blue valve at end of the catheter
Secure catheter flange with dressing
Attach extension tubing to 3-way tap, then attach drainage bag
Open 3-way tap and ensure drainage
IF SAMPLES ARE REQUIRED: attach the 20ml syringe used during insertion to the side port of the 3-way tap and aspirate 20ml for samples, then replace bung
Decant and send ascitic fluid samples if collected
Bin waste and gloves, dispose of sharps safely, clean trolley and wash hands
Fluid replacement: give 100ml 20% human albumin solution following every 2L ascites drained in cirrhotic patients; otherwise determine need for crystalloid fluids clinically
Drainage rate: free drainage of up to 5L over first 4 hours, then up to 1L/h (if hypotensive – limit to 0.5L/h throughout)
Fully document procedure in patients notes
Other notes
Drain can be left in for up to6 hours (risk of infection if left longer, especially for cirrhotic patients)
If ascitic fluid is still draining through tract after removal, attach stoma bag
Comments are closed for this post.