Please note content is for educational purposes only and procedures should not conducted based on this information. OSCEstop and authors take no responsibility for errors or for the use of any content.
Indications: cardiac tamponade (emergency); diagnosis of cause of pericardial effusion; drainage for palliative or prophylactic reasons
Guidance: ultrasound guidance is preferred; however, if the patient is critically unwell and ultrasound is unavailable, electrocardiographic monitoring may be used (or procedure may be performed blind in cardiac arrest)
Introduction
Skip this section if being performed in critically unwell patient
Wash hands, Introduce self, Patients name & DOB & wrist band, Explain procedure and get written consent
**Check patients clotting screen, platelet count and if they have been on an therapeutic anticoagulant/clopidogrel**
Perform pre-procedure observations and ensure patient has IV access
Ensure assistant is available and clinical and non-clinical bins are close by to dispose of waste
Confirm pericardial effusion using echocardiography, review images from possible insertion points (see below) and measure the distance of the pericardium from the skin
Preparation part
Wash hands and apply surgical hat and mask
Clean a large trolley
Gather equipment onto bottom of trolley (think through what you need in order)
Equipment list
2x Cleansing snap-sponges (iodine or alcohol/chlorhexidine)
Sterile drape with hole in centre (or 2-3 drapes without holes in)
10ml syringe and 3 needles (1 blunt fill 18G drawing-up needle, 1 orange 25G, 1 green 21G) for local anaesthetic
10ml syringe for aspiration during introducer needle insertion
2x 10ml syringes and 1 blunt fill 18G drawing-up needle for agitated saline flush
If using electrocardiographic monitoring, cardiac monitor
Walk to patient
Wash hands
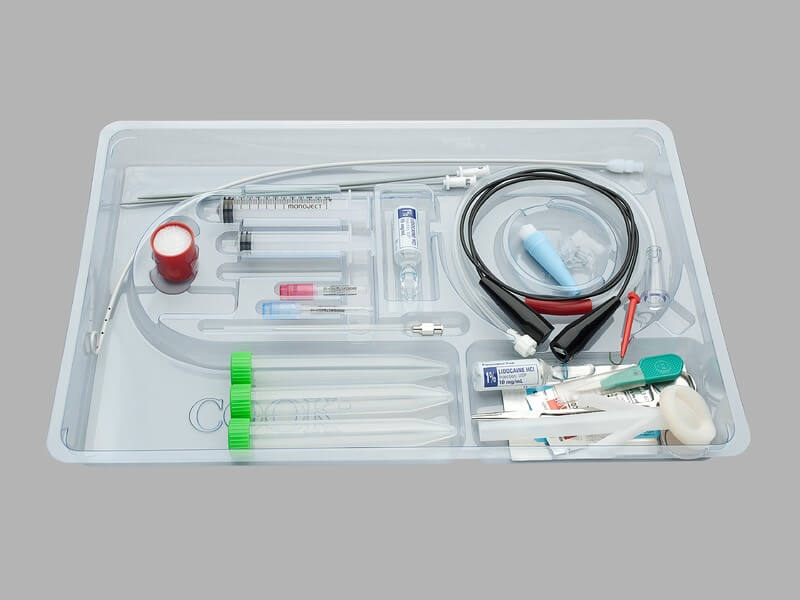
Open the pericardial drain kit to form a large sterile field on the top of the trolley
Open packets (without touching the instruments themselves) and drop sterile instruments neatly into the sterile field
Pericardiocentesis kit (permission for use granted by Cook Medical, Bloomington, Indiana)
Patient part
Positioning and exposure
Fully expose the anterior patient’s chest
Position patient lying supine on the bed at 30-45˚ with arms rested by side
Identify insertion point, options:
Sub-xiphoid approach: just below xiphoid, slightly to the patient’s left, at 30˚ from horizontal plane, aiming towards left shoulder
Apical approach: 5th intercostal space, mid-clavicular line, aiming towards right shoulder
Para-sternal approach: 5th intercostal space, immediately lateral to left sternal edge with needle perpendicular to skin
Preparation
Wash hands using Chlorhexidine solution, then apply sterile gown and gloves using the surgical scrub technique
Sterilize area
Work from middle outwards in one spiral motion using cleansing snap-sponge (sterilise the entire anterior chest)
Repeat this with 2nd cleansing snap-sponge
Discard used snap-sponges as they are no longer sterile, but note all equipment used after this (including all needles) can be returned to the sterile field after use
Apply the sterile drape over the patient’s body so that the hole is in the correct place to allow access to the insertion site (or apply 2-3 drapes centred around exposed insertion site if no holes)
With the help of the assistant, apply the sterile ultrasound cover and the sterile ultrasound gel and then hold the probe adjacent to the insertion point whenever a needle is being infiltrated to allow real-time ultrasound guidance
Anaesthetise area
Ask assistant to snap open lidocaine bottle and hold open upside-down
Draw up lidocaine using drawing-up needle on 10 ml syringe and expel any air
Change to the orange needle and insert at an acute angle to form a single subcutaneous bleb around insertion site in order to anaesthetise the skin
Change to the green needle and anaesthetise the insertion tract
This is done by instilling lidocaine in small increments of increasing depth
Always aspirate when advancing the needle (so you know if you get to the pericardial cavity) and aspirate before injecting lidocaine (to check you are not in a vessel)
Wait 1 minute to work
Insertion procedure
Make a 5mm skin incision (with the scalpel perpendicular to the skin, press the scalpel blade straight in and out)
Introducer needle insertion
If using electrocardiographic monitoring, attach the alligator clip of the electrocardiographic monitoring cable to the distal needle and ask the assistant to attach the other end to a cardiac monitor lead
Insert introducer needle
Sub-xiphoid approach: just below xiphoid, slightly to the patient’s left, at 30˚ from horizontal plane, aiming towards left shoulder
Apical approach: 5th intercostal space, mid-clavicular line, aiming towards right shoulder
Para-sternal approach: 5th intercostal space, immediately lateral to left sternal edge with needle perpendicular to skin
NOTE:the needle should be inserted lateral to the ultrasound probe, in the probe’s horizontal plane so the needle can be visualised the entire time
Once the introducer needle has punctured the skin, remove the stylet (if present) and attach a 10ml syringe
Slowly advance the needle through the insertion tract while:
Aspirating during infiltration
Watching the ultrasound monitor to guide needle
If using electrocardiographic monitoring, watch the cardiac monitor for ST elevation as the needle makes contact with the right ventricle
When pericardial fluid is aspirated, stop and remove the syringe from the needle
Position confirmation with agitated saline(if using ultrasound guidance in non-emergency setting)
Attach a 3-way tap to the end of the needle, with the needle’s port closed (off switch pointing to that port)
Ask assistant to snap open 10ml normal saline bottle and hold open upside-down
Draw up 5ml of the saline using a drawing-up needle on 10 ml syringe and expel any air and place in sterile field
Attach an empty 10ml syringe to a free port of the 3-way tap and move the off switch to close the empty port
Aspirate 5ml of pericardial fluid
Now attach the saline filled syringe to the other empty port and move the 3-way tap off switch to close the pericardial needle’s port
Holding the two syringes, expel each in turn repetitively to mix and agitate the saline with the pericardial fluid between the two syringes
When it makes a foamy colour, draw all of the fluid up in one of the syringes
Close the empty syringe’s 3-way tap port and inject the 10ml of agitated saline/pericardial fluid back in to the pericardium
Observe the ultrasound monitor to confirm the air bubbles are contained within the pericardial fluid
Remove the 3-way tap
3-way tap
Guidewire insertion
Insert the guidewire through needle so half the wire is in the chest
From now on, keep hold of the guidewire at all times with one hand, as close to the skin as possible – you can hold it in a loop to make things easier
Withdraw the needle and thread it right the way off the end of the guidewire, ensuring the guidewire remains in place
Tract dilation
Thread the smallest dilator over the guidewire and insert into the chest with a rotational movement
Withdraw the dilator and thread it right the way off the end of the guidewire, ensuring the guidewire remains in place
Repeat this with all of the dilators, working your way up the sizes
Drain insertion
Thread the drain over the guidewire until the tip is near the skin
Now retract the guidewire slowly until the end comes out of the drain
Holding the end of the guidewire, insert the drain into the chest
When the drain is in place, remove guidewire
Attach the 3-way tap with the drain’s port closed (hold finger over end of drain to stop spillage until this is attached)
Complete circuit
Attach drainage bag tubing to the end port of 3-way tap
Move the 3-way tap’s off switch to close the empty middle port to allow free drainage of pericardial fluid into the drainage bag
Drainage options
Free drainage (leaving drain in situ):
Suture the drain in place
Apply sterile dressing
Allow free drainage for ~30minutes prior to drain removal, or leave in place if likely to re-accumulate
Multiple aspirations (then immediate removal):
Attach 50ml syringe to middle port of 3-way tap and close the drainage bag’s 3-way tap port
Aspirate 50ml of pericardial fluid
Close the pericardial drain’s 3-way tap port and expel the syringe contents, which will then be diverted into the drainage bag
Move the 3-way tap’s off switch back to close the drainage bag’s 3-way tap port and repeat the process
Keep repeating the aspiration process above until there is no more fluid to aspirate then remove drain
Removal
Cut and remove the suture if present
Remove the drain
Close the pericardial drain’s 3-way tap port
Place a gauze over the drain site and slowly retract the drain

Comments are closed for this post.