Please note content is for educational purposes only and procedures should not conducted based on this information. OSCEstop and authors take no responsibility for errors or for the use of any content.Drug doses cannot be guaranteed to be correct.
Aspiration indications: diagnose cause of swollen joint; tense effusion symptom relief
Blood culture bottles or 2 white-topped sample collection bottles, and 1 purple EDTA tube if doing aspiration
80mg Depo-Medrone (methylprednisolone acetate) in 2ml vial if doing large joint injection
40mg Depo-Medrone (methylprednisolone acetate) in 1ml vial if doing medium/small joint injection
Walk to patient
Wash hands
Open sterile pack to form a sterile field on the top of the trolley
Open packets (without touching the instruments themselves) and drop sterile instruments neatly into the sterile field
Pick up waste bag from sterile pack without touching anything else and stick to side of trolley
Patient part
Positioning and exposure
Position patient
Expose joint and place incontinence pad below
Examine the surface anatomy of patient’s joint
Locate insertion point
Mark insertion point with a skin pen/indentation
Preparation
Wash hands
Apply sterile gloves using sterile technique (open pack on a side surface)
Sterilize area
Work from middle outwards in one spiral motion (using cleansing snap-sponge)
Repeat with second cleansing snap-sponge
Discard used snap-sponges as they are no longer sterile, but note all equipment used after this (including all needles) can be returned to the sterile field after use
OPTIONAL: Apply the sterile drape over the patient’s body so that the hole is in the correct place to allow access to the insertion site (or apply 2-3 drapes centred around exposed insertion site if no holes)
Anaesthetise tract
Ask assistant to snap open lidocaine bottle and hold open upside-down
Draw up lidocaine using drawing-up needle on 10 ml syringe and expel any air (maximum 7ml if doing injection so the rest can be used with the injection)
Change to the orange needle and insert at an acute angle to form a single subcutaneous bleb around insertion site in order to anaesthetise the skin
Now use the same needle to anaesthetise the insertion tract up to the joint capsule
Always aspirate when advancing the needle (so you know if you enter the joint capsule) and aspirate before injecting lidocaine (to check you are not in a vessel)
Joint aspiration
With a 20-50ml syringe on the aspiration needle, stretch the skin and insert into the insertion tract
Aspirate during infiltration
As soon as fluid enters the syringe, stop advancing the needle and aspirate to fill the syringe/as much as possible
Withdraw the needle
Joint injection
Ask assistant to snap open Depo-Medrone bottle and hold this and the lidocaine bottle open upside-down
Draw up the Depo-Medrone and some lidocaine into the same syringe using a green needle and expel any air
Large joint: 2ml Depo-Medrone + 3ml lidocaine (in 5ml syringe)
Medium joint: 1ml Depo-Medrone + 1ml lidocaine (in 2.5ml syringe)
Small joint: 0.25ml Depo-Medrone + 0.25ml lidocaine (in 1ml syringe)
Change to the injection needle, stretch the skin and insert into the insertion tract
Aspirate during infiltration
When in place, aspirate to ensure you are not in a vessel and slowly expel the contents of the syringe
Position patient lying supine with the knee extended
Identify the midpoint of the superolateral border of the patella
Insert needle 1cm above and 1cm lateral to this point
Direct the needle inferomedially and angle slightly posteriorly (at ~ 45˚ from horizontal plane), between the posterior surface of the patella and the intercondylar femoral notch
Position patient lying supine with the knee extended
Identify the junction of the upper and middle third of the patella on its medial or lateral border
Apply pressure to the opposite border of the patella to open the joint space
Palpate the groove under the patella (~5-10mm laterally) and insert the needle here
Direct the needle medially and a little inferiorly in the horizontal plane, between the posterior surface of the patella and the intercondylar femoral notch
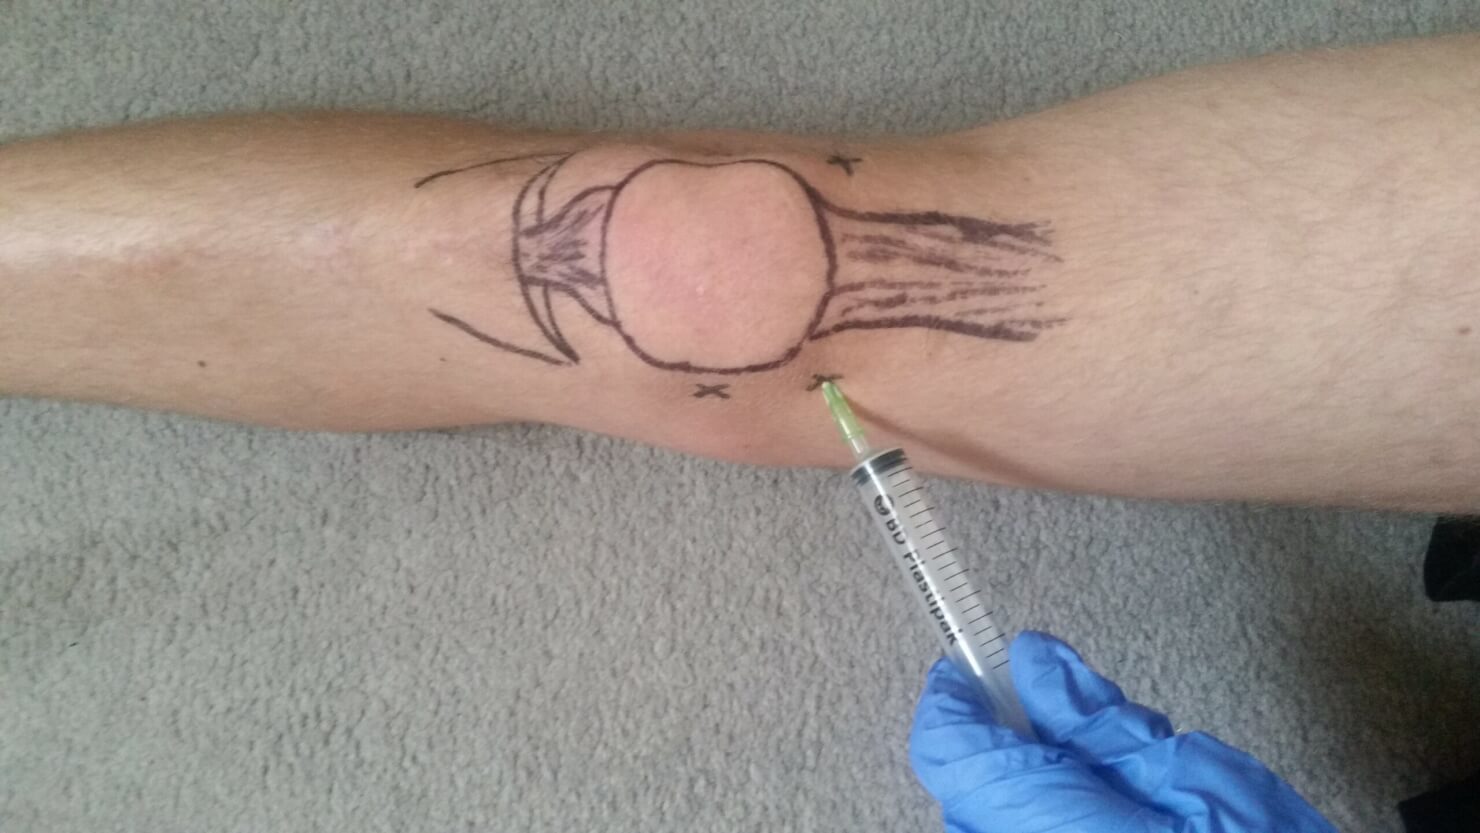
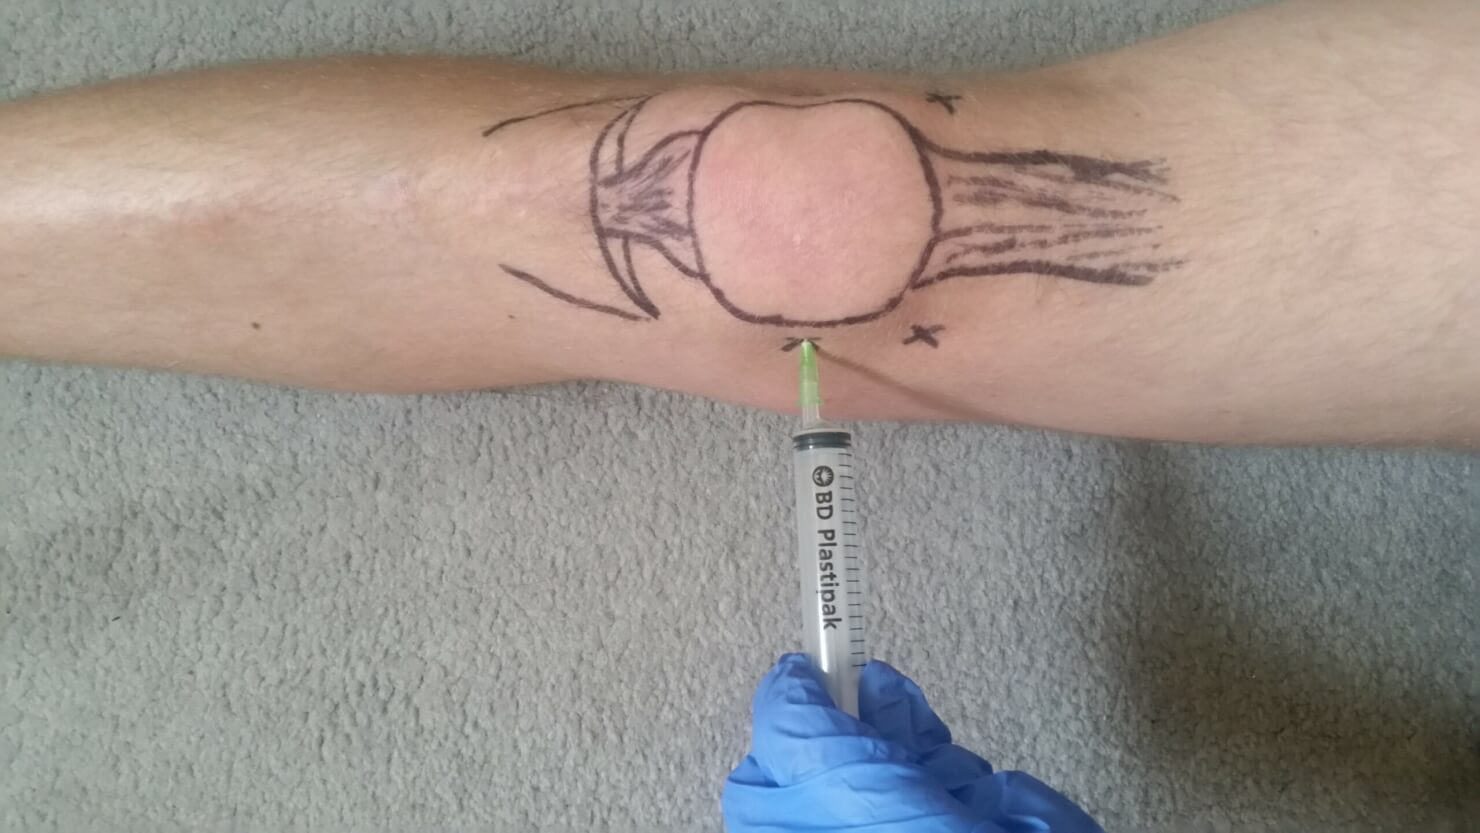
Knee aspirate – parapatellar approach
Infrapatellar approach
Position patient sitting on the side of the bed with knees at 90˚ over side
Identify the inferior border of the patella and the patella tendon
Insert the needle 5mm inferior to the inferior border of the patella, just lateral to the patella tendon
Direct the needle superomedially and angle slightly posteriorly (at ~ 45˚ from horizontal), between the posterior surface of the patella and the intercondylar femoral notch
Note: lateral approaches are described above but identical medial approaches may also be used
Shoulder
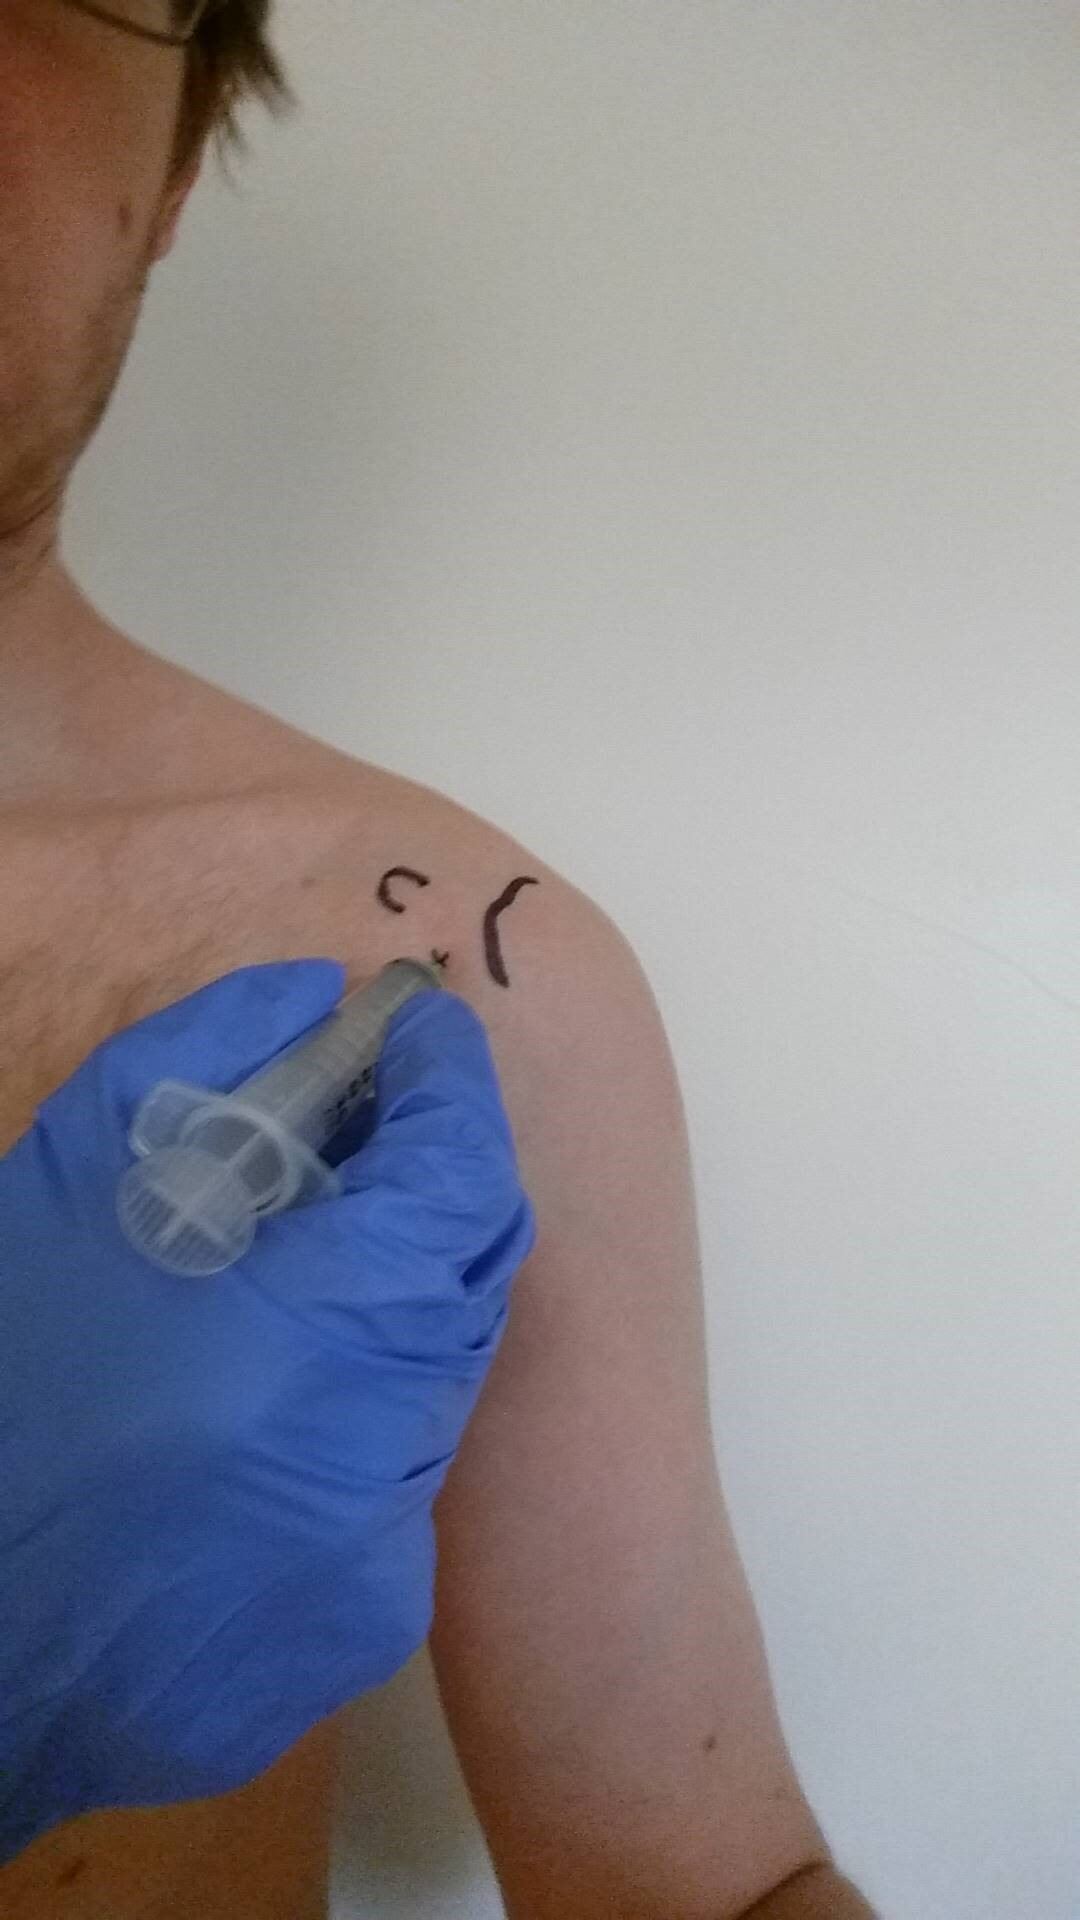
Anterior approach (preferred)
Position the patient in a seated position with their shoulder externally rotated
Palpate the coracoid from anteriorly
Insert the needle 1cm lateral to the coracoid (medial to head of humerus)
Direct the needle posteriorly and angle slightly superolaterally
Shoulder aspirate – anterior approach
Posterior approach
From posteriorly, palpate the acromium (posteriorly) and coracoid (anteriorly)
Insert the needle 1cm inferior to the posterior tip of the acromium
Direct the needle anteriorly and angle slightly medially towards the coracoid
Wrist
Position the patients forearm on a stable surface, with their palm facing downwards
Ask the patient to extend their thumb to identify the extensor pollicis longus tendon, and also locate Lister’s tubercle (bony prominence at distal end of radius)
Insert the needle distal the Lister’s tubercle and lateral to extensor pollicis longus tendon
Direct the needle ventrally, perpendicular to the forearm
Wrist aspirate
Elbow
Position the patients elbow at 90˚ flexion, rested on a stable surface
Palpate the olecranon process, the lateral epicondyle and the radial head
Insert the needle the centre point of this triangle, perpendicular to the skin
Elbow aspirate
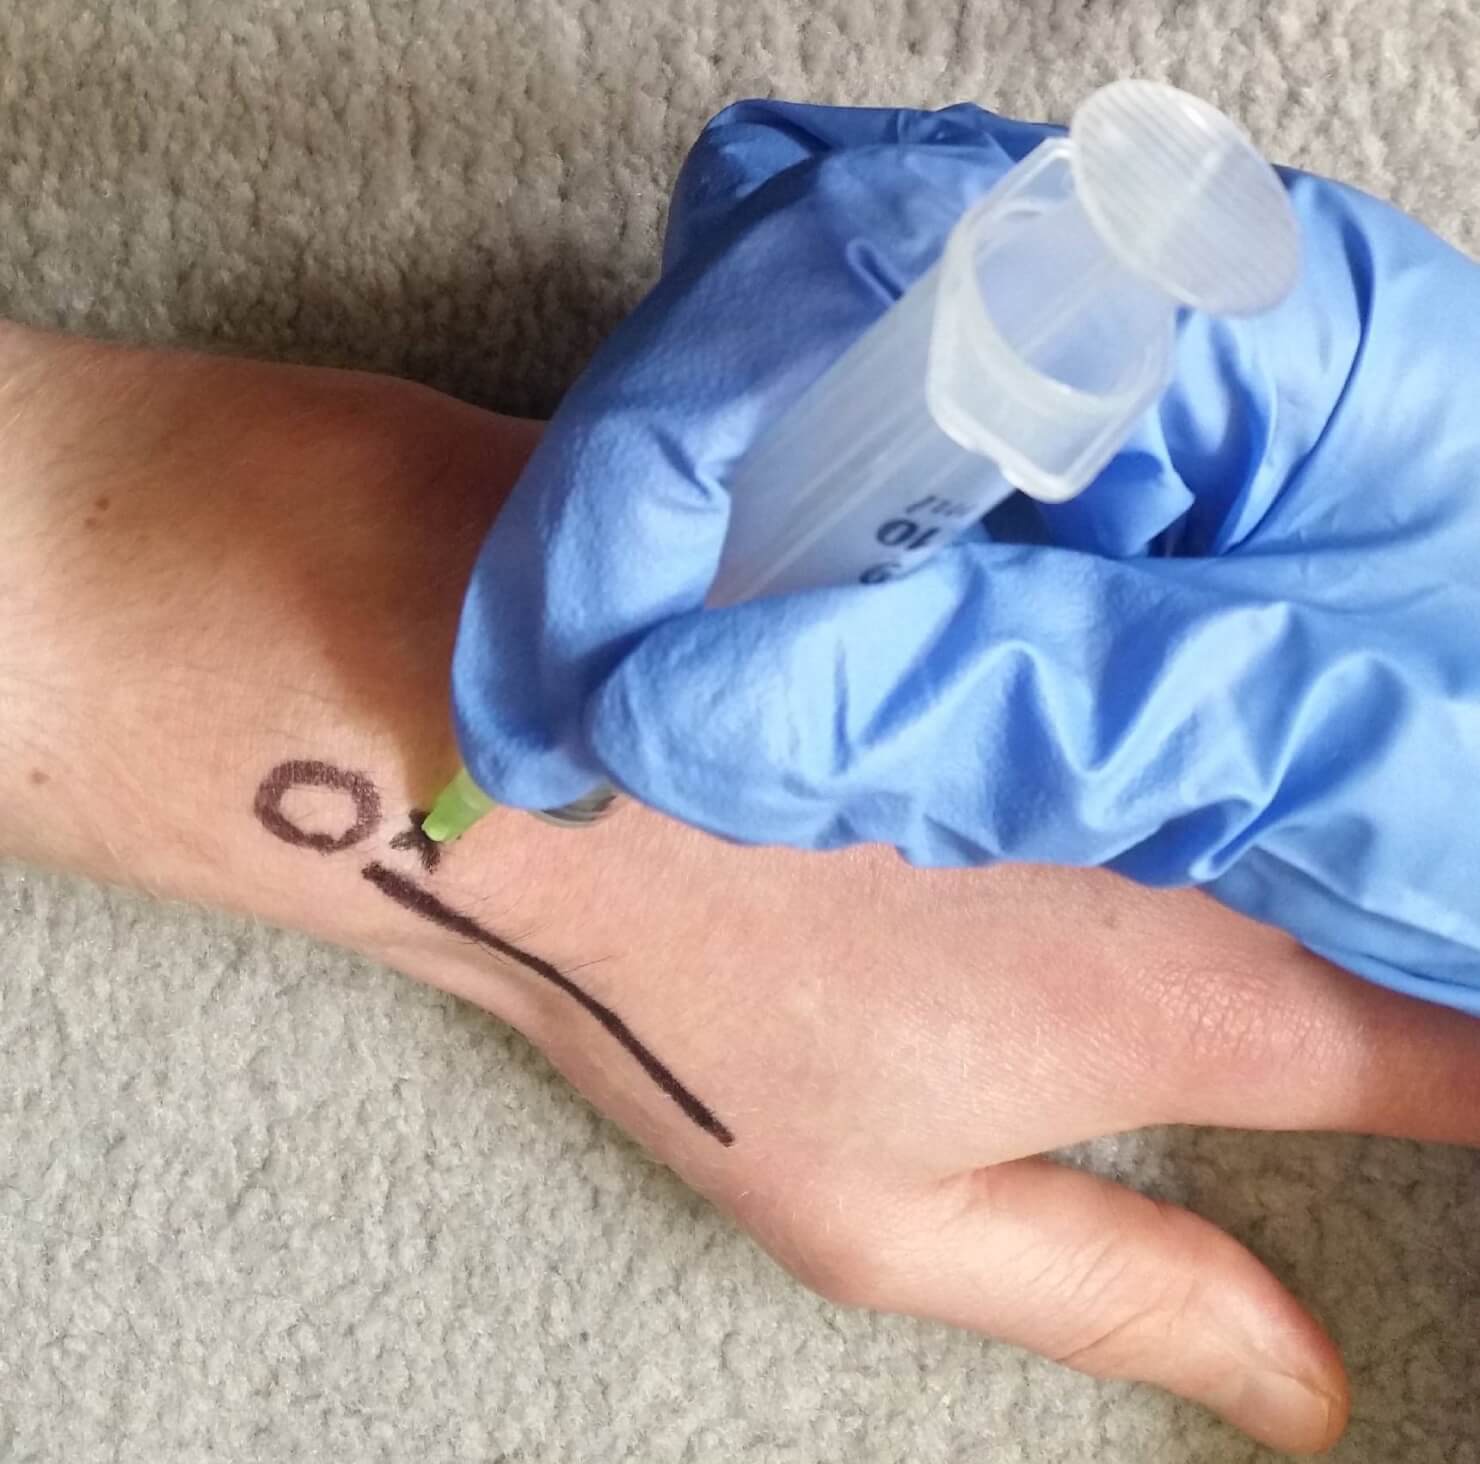
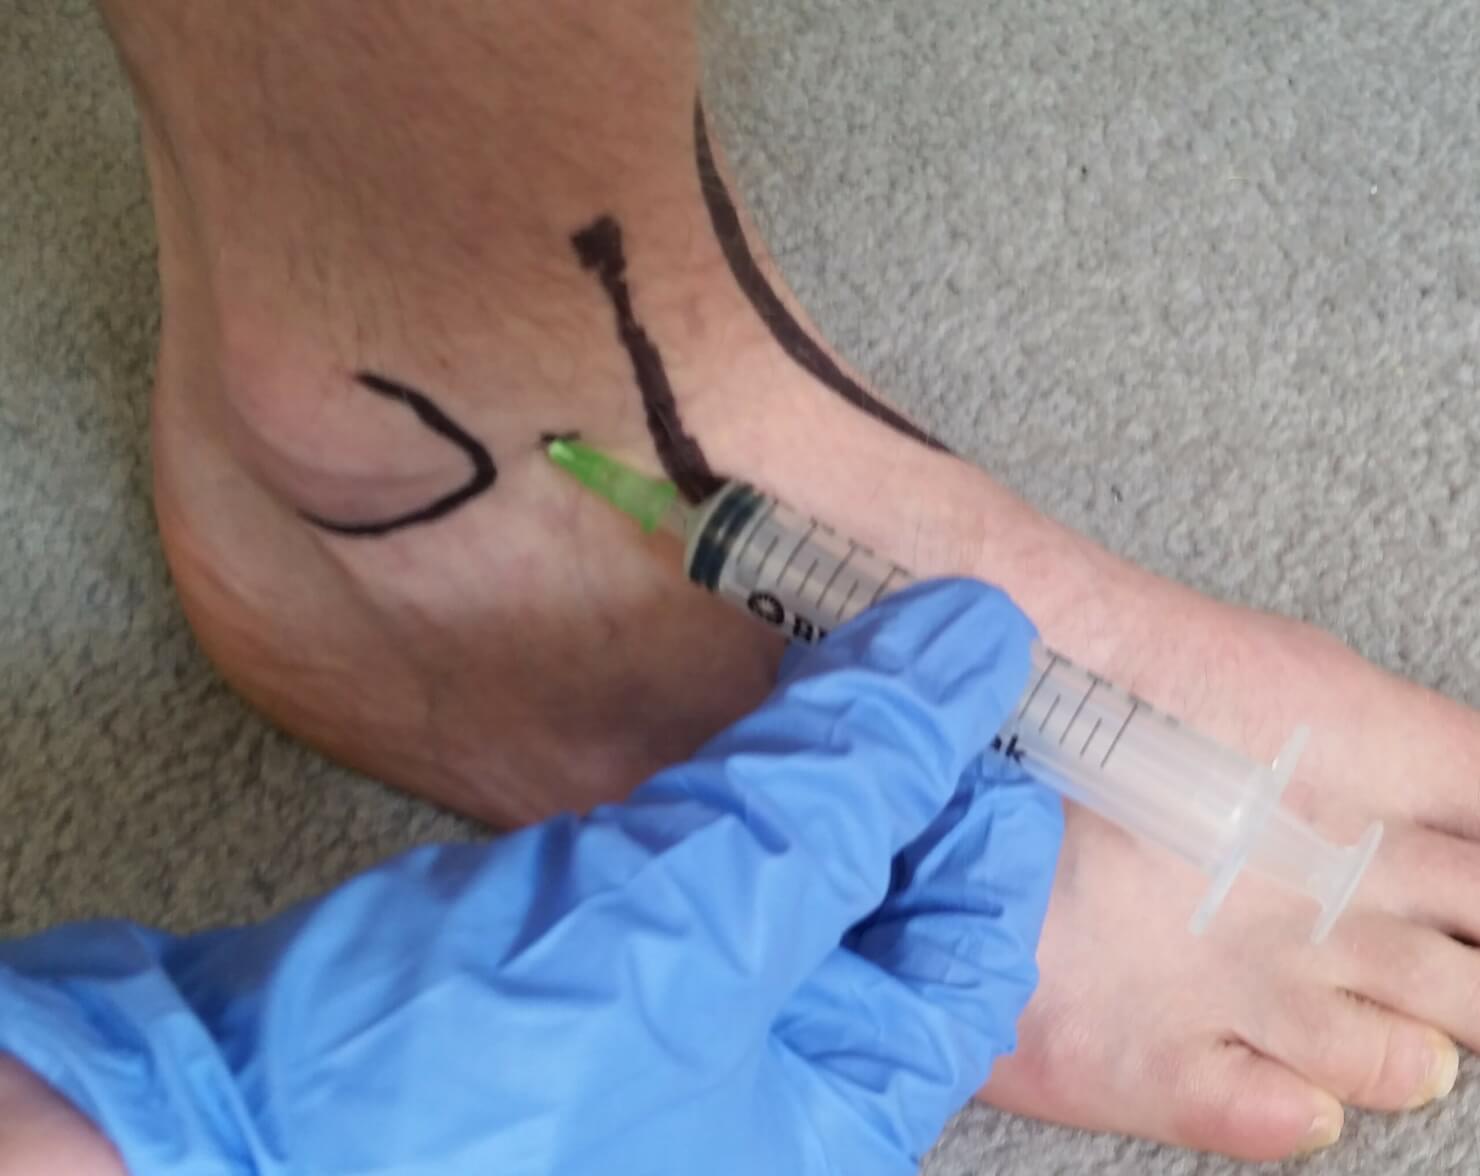
Ankle
Anterolateral approach (preferred)
Position the patient lying supine with ankle at 90˚
Palpate the space between the lateral malleolus (laterally) and the extensor digitorum longus (medially) in the ankle joint line
Insert the needle midway between
Aim the needle posteriorly, perpendicular to the fibular shaft
Ankle aspirate – anterolateral approach
Anteromedial approach (risks damage to dorsalis pedis and deep peroneal nerves)
Position the patient lying supine with ankle at 90˚
Palpate the space between the medial malleolus (medially) and the tibialis anterior tendon (laterally) in the ankle joint line (just above the talus)
Insert the needle midway between
Aim the needle posteriorly and slightly laterally, perpendicular to the tibial shaft
Note: you can ask patient to dorsiflex foot against resistance to help identify tendons
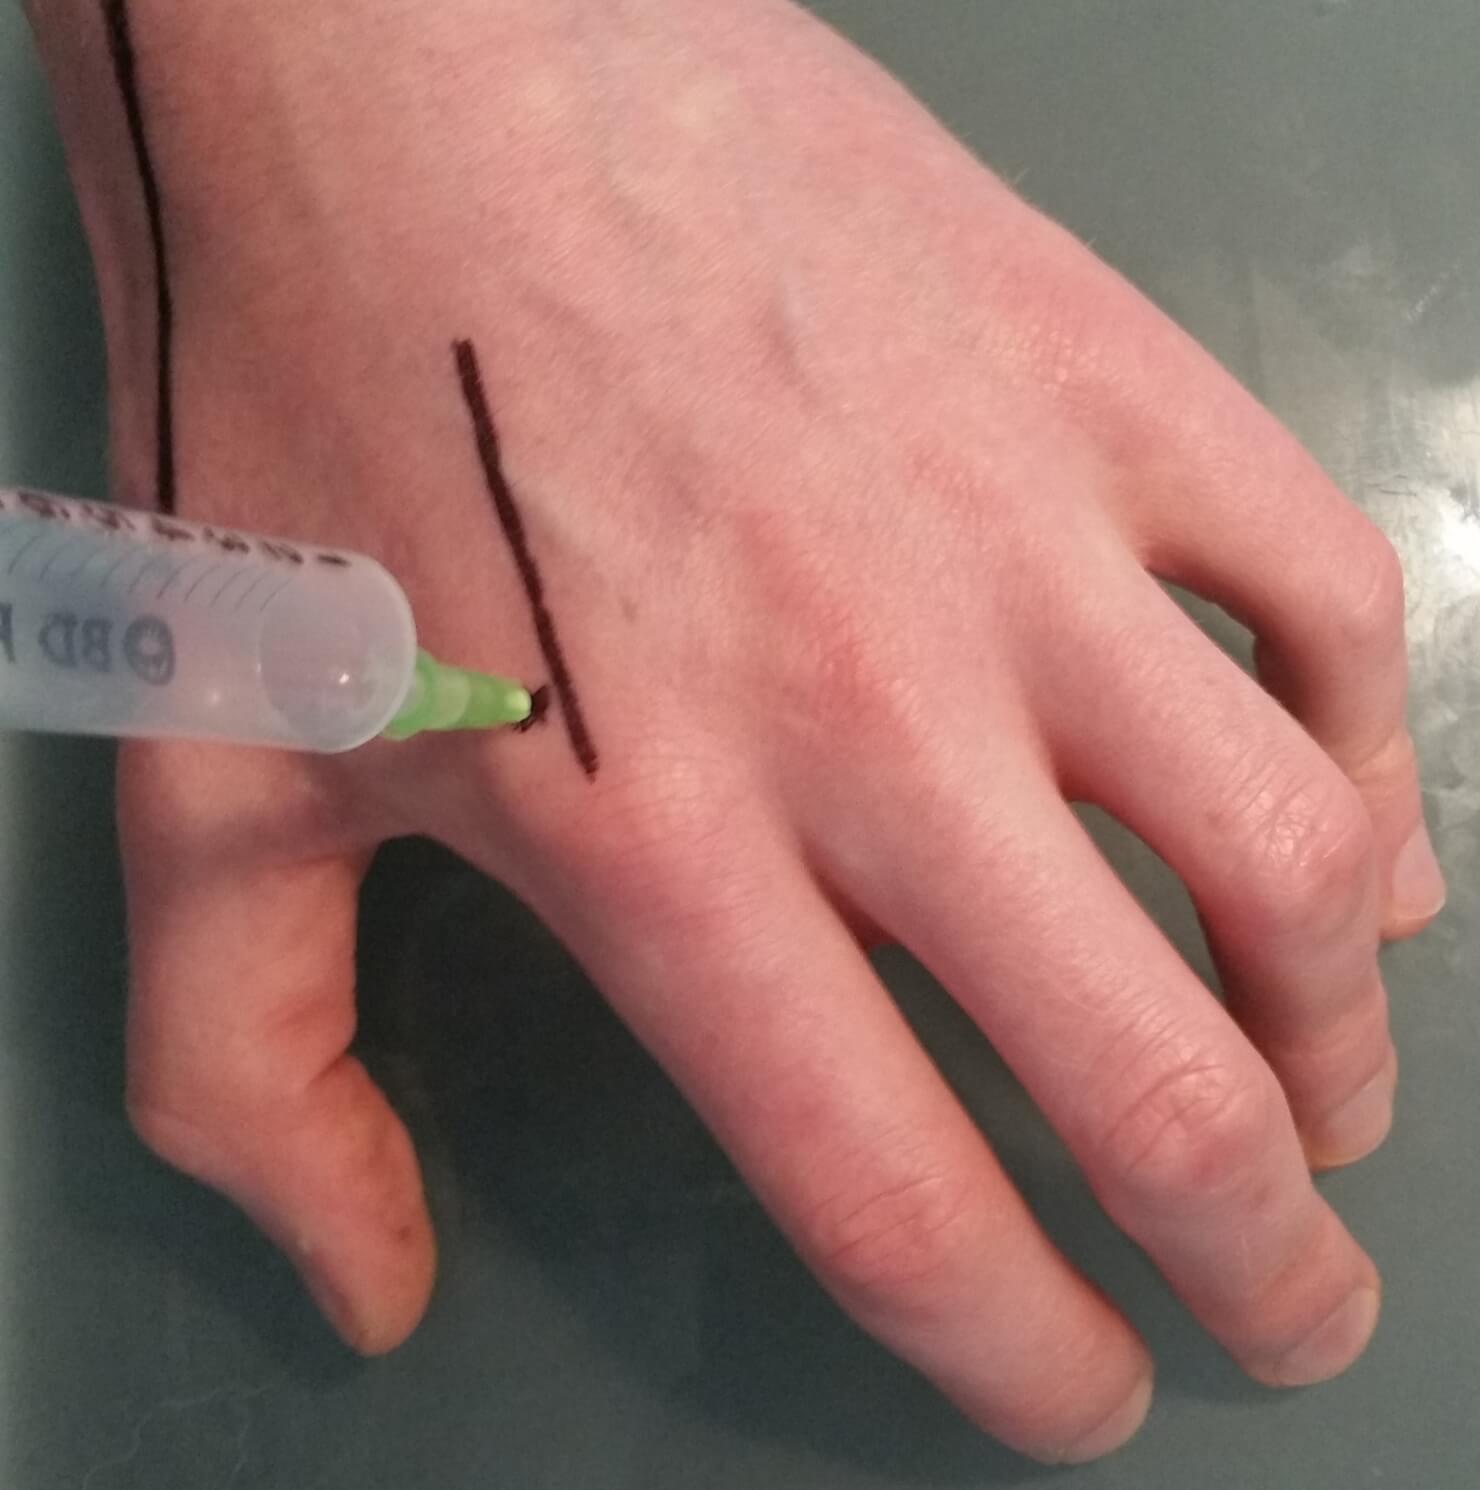
Metacarpophalangeal joint
Rest the hand on a stable surface, palm down with the fingers slightly flexed
Insert the needle dorsally, either medial or lateral to the extensor tendons
MCP joint aspirate
To complete
Thank patient and cover them
Bin waste and gloves, dispose of sharps safely in sharps bin, clean trolley and wash hands
If required, label sample tubes and send to lab:
MC&S (blood culture bottles or white-top x2) → microbiology
Crystals (white-top) → cytology
Cell count (purple EDTA tube) → haematology – if the local hospital haematology laboratory do not do synovial fluid cell counts, the MC&S should be sent in a white-top, so microbiology can do cell count
Fully document procedure in patients notes
Learn how to interpret the results too…
Synovial fluid result interpretation is covered here!

Comments are closed for this post.